Using iTunes

2023-11-08
Apple's iTunes application provides several functions on the Mac.
- Storing, converting, and playing music. Also videos, podcasts, ringtones, streamed media.
- Moving information to and from iPods connected to the computer. Also iPhones and iPads.
- Providing access to the online iTunes Store.
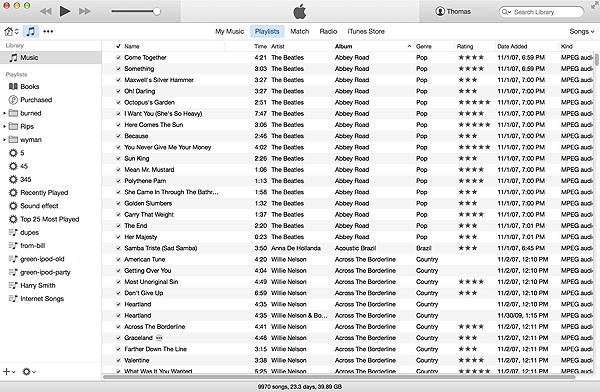
Here is a brief introduction to some common iTunes tasks.
Apple has a ![]() Knowledge Base article that will be helpful too.
You can buy whole books on the subject, or Google for days.
Knowledge Base article that will be helpful too.
You can buy whole books on the subject, or Google for days.
iTunes 12 was released in October 2014 for Yosemite and Mavericks. iTunes 12.4 came with El Capitan. iTunes 12.7 came with Sierra 10.12.6.
iTunes 12.4
The most recent iTunes (12.9) has changed the controls around again. The way to copy music from one Home Sharing computer to another is different: you no longer drag and drop; instead you view the "from" system, highlight the songs you want to copy, right click and select "Import."
Common Tasks
Import a Music CD to iTunes
- Insert a music CD (or MP3 CD) into the drive. If a dialog box pops up, choose open iTunes
- iTunes will open, identify the CD, and look up the track names.
- Click in the bottom right. All tracks will be loaded onto the main storage volume in the Music library.
- Click on the eject button (⏏) next to the music CD's name or hit eject on the keyboard.
Play Tracks at Random
- iTunes used to have a feaure named Party Shuffle, later called iTunes DJ. It was removed in iTunes 11. Here is how to approximate it.
- In iTunes, create a new Smart Playlist. If the sidebar is showing, click the plus sign at the lower left and choose New Smart Playlist. In the dialog box, pick a rule that will choose the music you want, e.g. and check . You can chain playlists together that use "and" and "or" rules to implement complex logic. Name the playlist something, say "345".
- Create a second smart playlist, and pick two rules: and . Then check and choose a very big number for N. Save this playlist and name it e.g. "DJ345".
- Select your DJ playlist in the left sidebar. Then click the Play arrow. If the "shuffle" icon is not bright blue (little crossed arrows), click it.
- This is how we play music on the living room hi-fi.
Burn a Music CD
- Click on the plus in the bottom of the left sidebar to create a new playlist, and name it something.
- Find the tracks you want and drag them to the new playlist.
- Right click (control-click) on the playlist and select .
- Select (or if making a disc for the car). Click . If the list won't fit on the disc, it will display an error.
- Insert a blank CD-R.
- It should start burning afer a minute or so. Wait till it finishes.
- Eject the disc (with ⏏) and write the title on it.
- You can print a listing of the playlist, or even a CD insert.
Back up iTUnes
To back up your entire library, see "Back up iTunes" in the Backup article.
Share Music Among Computers
See the article iTunes: How To Share Music and Video. It explains the difference between "Music Sharing" and "Home Sharing."
Deleting Some Tunes
What if you have too much music, and your main storage volume is filling up with it? Here is how to mark the stuff you don't want to keep on your machine, back it up to disc, and delete it.
- If the "rating" column is not showing, make it visible.
- Sort by rating.
- Pick, say, "one star" to mean that you want to delete the track.
- Make sure that any track you want to keep has a rating other than one star.
- Mark all the tracks you want to delete with one star. You can use to set the attributes of many tracks in one operation.
- Make a Smart Playlist with only the songs that have one star, and burn it to a backup disc.
- Switch to the Music view, sort by rating, and delete all the one-star music.
Use iPod
- Plug an iPod into a USB cable to the Mac. iTunes will open and show the iPod in the top bar. (This also starts charging the iPod battery.)
- Click on the iPod icon in the top bar. The left sidebar will change to show the various settings panels.
- Drag tracks to the Music folder on the iPod, make playlists, etc.
- To finish up, click Done on the bottom right before unplugging the iPod.
Use iPhone
- Plug an iPhone into a USB cable to the Mac. iTunes will open and show a little iPhone icon in the top bar. This also charges the iPhone battery.
- Click on the iPhone icon. The left sidebar will change to show the various settings panels.
- As of iTunes 12.7, you no longer use iTunes to manage Apps on your phone. Do it on the phone itself with the App Store app. You can still use iTunes to back up your phone to the Mac and to install new versions of iOS.
- You can drag music tracks to the iPhone in the sidebar. See Changes in the new iTunes
- Click on the phone icon and click the button in the lower right of the Summary panel, to copy music and pictures to the phone and synchronize books with iBooks. If you get an "error -54" from iTunes when doing this, try unlocking your iPhone.
- To finish up, click Done on the bottom right before unplugging the phone.
Make Custom Ringtone for iPhone
- In iTunes , set your Import Settings to use the AAC Importer.
- Pick a song.
- Right click and on the song.
- Set the start and end times. Ring tones should be 20-30 seconds.
- Select .
- Right click on the new version and delete it, put it in trash.
- Find the file in the trash, move it somewhere else, and change its suffix from .m4a to .m4r.
- Connect your phone to the Mac with a USB cable.
- In iTunes, you will see a little iphone image in the top bar. Click it. The general info on the phone should display.
- In iTunes, click Tones in the left sidebar. A list of your custom ringtones should display.
- Drag the .m4r file to the list of tones.
- In iTunes, click Sync to send the ringtone to the iPhone.
- To finish up, click Done on the bottom right before unplugging the iPhone.
- In iTunes, Get Info on the original song and reset the start and stop time by unchecking the boxes.
- In iTunes, reset your Import Settings to MP3 Importer.
- You can delete the .m4r file.
Security
There have been rare reports on ![]() MacInTouch.com about people having their iTunes accounts hijacked.
Some of these folks were using an online poker game. (Might have been some kind of malware inserted into an advertisement.)
Others had used the same password on multiple sites, or used weak passwords that were guessed.
Use a strong, unique password for iTunes, and watch your account.
MacInTouch.com about people having their iTunes accounts hijacked.
Some of these folks were using an online poker game. (Might have been some kind of malware inserted into an advertisement.)
Others had used the same password on multiple sites, or used weak passwords that were guessed.
Use a strong, unique password for iTunes, and watch your account.